.png?width=540&name=Mock-up-(SS).png)

Once you have an image that will back up the design of your eCard, you will need to add this to a new Word document, and add the merge fields.
Add image
1) Open a new Microsoft Word document and adjust the orientation (usually Portrait) and margins to your needs.
a. Ideally margins should be the minimum possible before risking printers cutting off the edges of the template. Word will notify you if you have selected margins outside printing range:
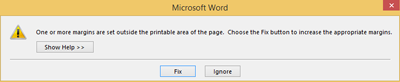
Click image to expand.
2) Insert the eCard image that you have prepared into the Word document via Insert > Picture.
3) Adjust the position of the image if you need to do so. Increasing the size of your image may reduce its quality.
4) Wrap the image to appear behind text by right-clicking on the image, then clicking Wrap Text > Behind Text.
You will then need to add merge fields to the Word document. As with any mail merge, these fields will be replaced with specific information for each student when you send it from Messenger. Messenger receives this information from your school’s MIS.
1) To create a text box, click Insert > Text Box. Choose a text box to add to your eCard.
2) Remove the auto-filled contents from the text box you have added. You will also need to move the text box to the right place on top of your template.
3) Adjust the font, font size and colour as needed. You may also wish to consider removing or adjusting any borders or background colours of the text box to give the merge fields a cleaner finish on top of your eCard template. Just right-click on the text box to view the options.
4) Ensure the text box is suitably wide enough to cater for long names or descriptions. You should also consider the font size you have chosen when adjusting the width of the text box.
5) To add the merge field, first ensure your cursor is in the text box. From the menu panel at the top of the page, click Insert and then click ![]() Quick Parts > Field.
Quick Parts > Field.
6) Under Field names, select MergeField. Then from the Field name (in the middle panel), enter the relevant merge field name.
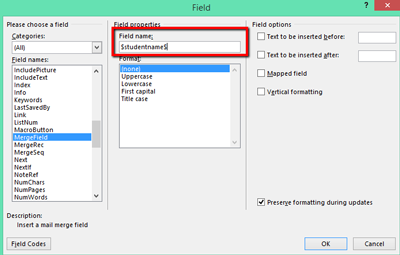
Click image to expand.
a. Tokens need to have a $ sign on both sides and no spaces in between, e.g. $studentname$.
7) You will be able to view a full list of merge fields from your Messenger Admin account by clicking Tools > Libraries > Manage Merge Document. From that page, click ![]() from the top right. For a shortlist on tokens you may commonly use for new eCard templates, please see below.
from the top right. For a shortlist on tokens you may commonly use for new eCard templates, please see below.
8) Repeat steps 1-7 for all merge fields needed. You may find it easier to copy and paste the first text box you added to your template (as per steps 1-4), and then add a new merge field to each text box.
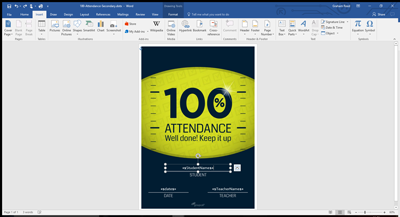
Click image to expand.
9) Save your document in an easy to find location on your computer, and as a standard .docx file. To ensure you have saved the file as a .docx, click Save As, and choose to Save as type: Word Document (usually the first option).
Top Tip: You must add a merge Field by clicking Insert and then click
Quick Parts > Field for every text box you add to your eCard template. This will ensure that Messenger recognises the merge fields when sending eCards.
Once you have created a new merge document template, follow the steps below to add the new eCard to Messenger.
1) From your Messenger admin account, click on Tools, then click Libraries > Manage Merge Documents.

Click image to expand.
2) Under School Templates, click Upload New Template.
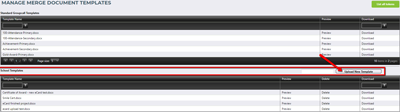
Click image to expand.
3) Locate and select the eCard template you wish to add to Messenger.
Top Tip: If you upload a file with the same name as another template, uploading the template will update/overwrite the existing file.
1) Click on ![]() Advanced Messaging from the side panel on the left.
Advanced Messaging from the side panel on the left.
2) After you have selected your contacts and are ready to compose your email, click on ![]() . From the pop-up box, select the template you wish to send to parents. When you are ready, click Next from the top right corner.
. From the pop-up box, select the template you wish to send to parents. When you are ready, click Next from the top right corner.
3)Before you send the message, you will have a chance to preview the message, and update any tokens for the merge fields in your template.
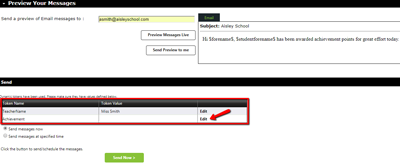
Click image to expand.
If you need to use an image or background from an eCard you previously added to Messenger, to convert to a new-style eCard, follow the simple steps below.
1) Open Messenger and click on ![]() Tools from the side menu on the left. From the Tools menu, click Libraries and then choose Message Library.
Tools from the side menu on the left. From the Tools menu, click Libraries and then choose Message Library.
2) On the left, open the eCard Message Template from which you would like to extract the image/background.

Click image to expand.
3) From the top of the main panel, click on the Email tab.
4) From the bottom of the email text editor, click  to locate the URL for the image. It will usually be found in the second line of text, after background:url. Ensure you highlight and copy everything between the apostrophes, including the https://.
5) Paste the URL into a new tab in your internet browser and hit Enter on your keyboard. You should see the eCard image (minus the tokens) appear.
6) Right click on the image to save it. You will now be able to use this when making a new eCard template.